
Connecting Klaviyo
Introduction
In this article, you'll learn how to integrate Hiro Analytics with Klaviyo and start syncing your email, SMS, Push, and WhatsApp marketing performance data. Once connected, Hiro Analytics will automatically pull your campaign metrics, flow data, and order attribution data to provide powerful insights about your retention marketing.
Before you begin
Before integrating Hiro Analytics with Klaviyo, ensure you have:
Manager-level access or above to your Klaviyo account - You need manager permissions to authorize the connection between Klaviyo and Hiro Analytics
A Hiro Analytics account - If you don't have one yet, book a demo to get started with a free trial
This integration works for both individual brands and agencies managing multiple client accounts.
Installation steps
Install Hiro Analytics from the Klaviyo App Marketplace
Navigate to the Klaviyo App Marketplace and search for "Hiro Analytics"
Click on the Hiro Analytics app listing
Click Add Integration or Install App
At this point you will be linked to Hiro Analytics and prompted to log in to your account.
Authorize the connection on Hiro
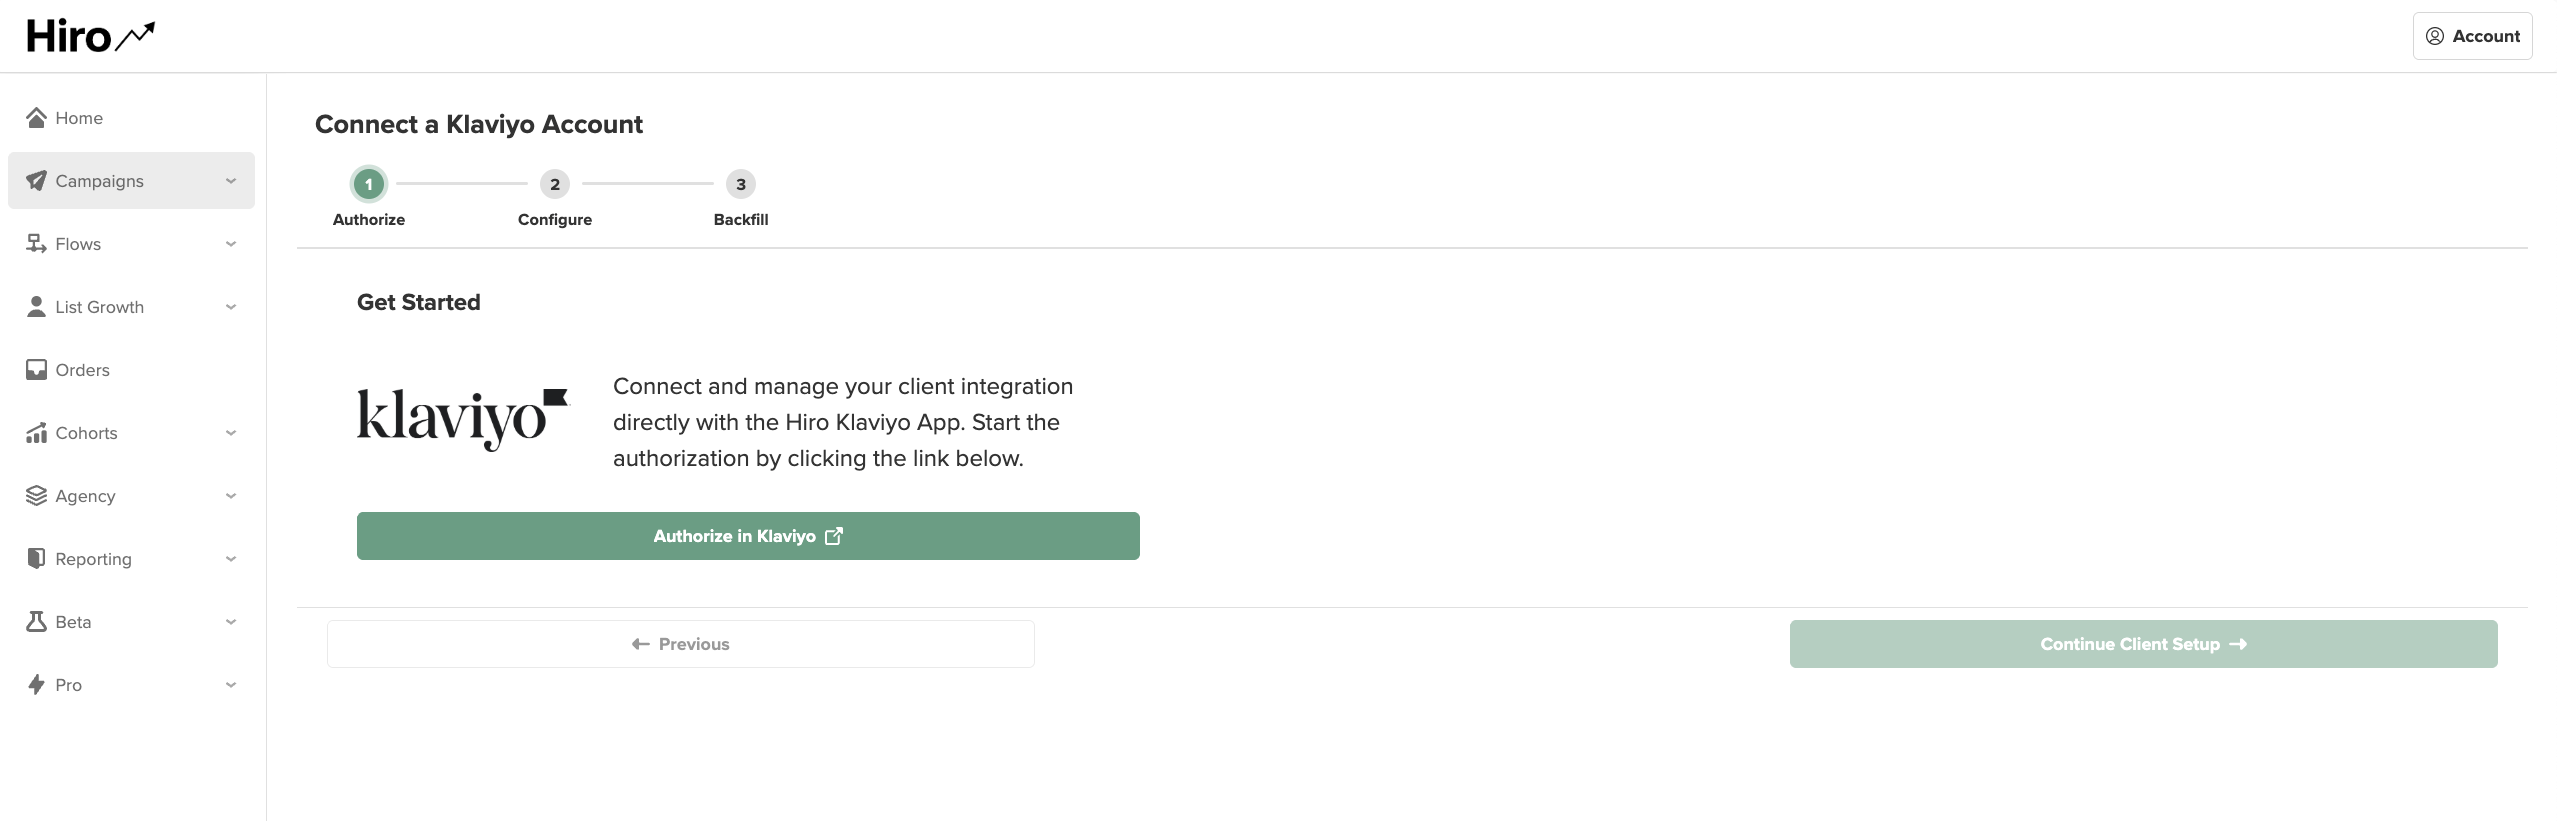
Once logged in to Hiro, you will be directed here to begin the Klaviyo Authorization process using OAuth. Start by clicking "Authorize in Klaviyo"
At this point you will be directed back to Klaviyo to select the account you would like to connect and review the permissions you are granting to Hiro.
Once you've reviewed and agree, click "Allow". This will direct you back to Hiro to finish your account configuration.
If you are running into issues with the OAuth connection, you can choose to connect the client in Hiro with a read-only private API key.
Settings → Account → API Keys → Create a new private API key called "hiroanalytics" → Select Read Only
Copy key from Klaviyo and paste in Hiro.
Complete the Account Configuration in Hiro
You can choose edit your Client Name (if different than your Organization Name in Klaviyo)
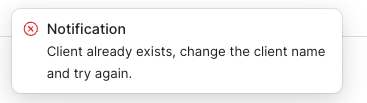
If you see an alert saying "Client already exists, change the client name and try again," it means you need to make the client name unique. This happens when the same client name is used by another agency in our database. You can do this by adding your agency initials or changing the case of the client name.
Then choose the Ecommerce Platform associated with your primary conversion metric (Shopify, BigCommerce, WooCommerce, Custom API, etc.)
If you have multiple team members on Hiro, you can choose to give access for the entire team here under Permissions.
IMPORTANT - The last step is to copy over your attribution settings from the Klaviyo Attribution Settings page into Hiro. It is important to review these carefully and make sure they match exactly, including any of the exclusion checkboxes under the attribution window section.
Once you're ready, click Finish Connecting Client to start the Klaviyo Account Sync.
Note: This can take anywhere from a few hours to a few days depending on the size of your brand and length of your history with Klaviyo. You will receive an email confirmation once the data is fully synced and your account is ready to use.
Next steps
Once your Klaviyo integration is live, you can:
Set up additional marketing channel integrations - Connect your SMS platform (Attentive, Postscript) to get a complete view of your retention marketing performance
Configure custom dashboards - Create client-specific or brand-specific views with the metrics that matter most to your business
Enable automated reporting - Set up Slack notifications or scheduled reports to keep your team informed of key performance trends
Additional resources
Hiro Onboarding Guide - Complete guide to setting up and optimizing your Hiro Analytics account
Managing Team Users - Learn how to add team members and manage permissions in Hiro Analytics
Filtering Out Recurring Subscription Revenue - Configure revenue tracking to exclude subscription orders from campaign attribution
Need help? Contact the Hiro Analytics support team at help@hiroanalytics.com or reach out in your Slack channel for assistance!