
Managing Client Access
Once you've connected your client accounts into your agency account, you can give clients access to their Hiro dashboards by inviting them via email.
Access Levels
There are two types of permissions you can grant:
1. Custom Dashboard Only
Clients can only view the Custom Dashboard you've created for them. They will not see any additional pages in Hiro.
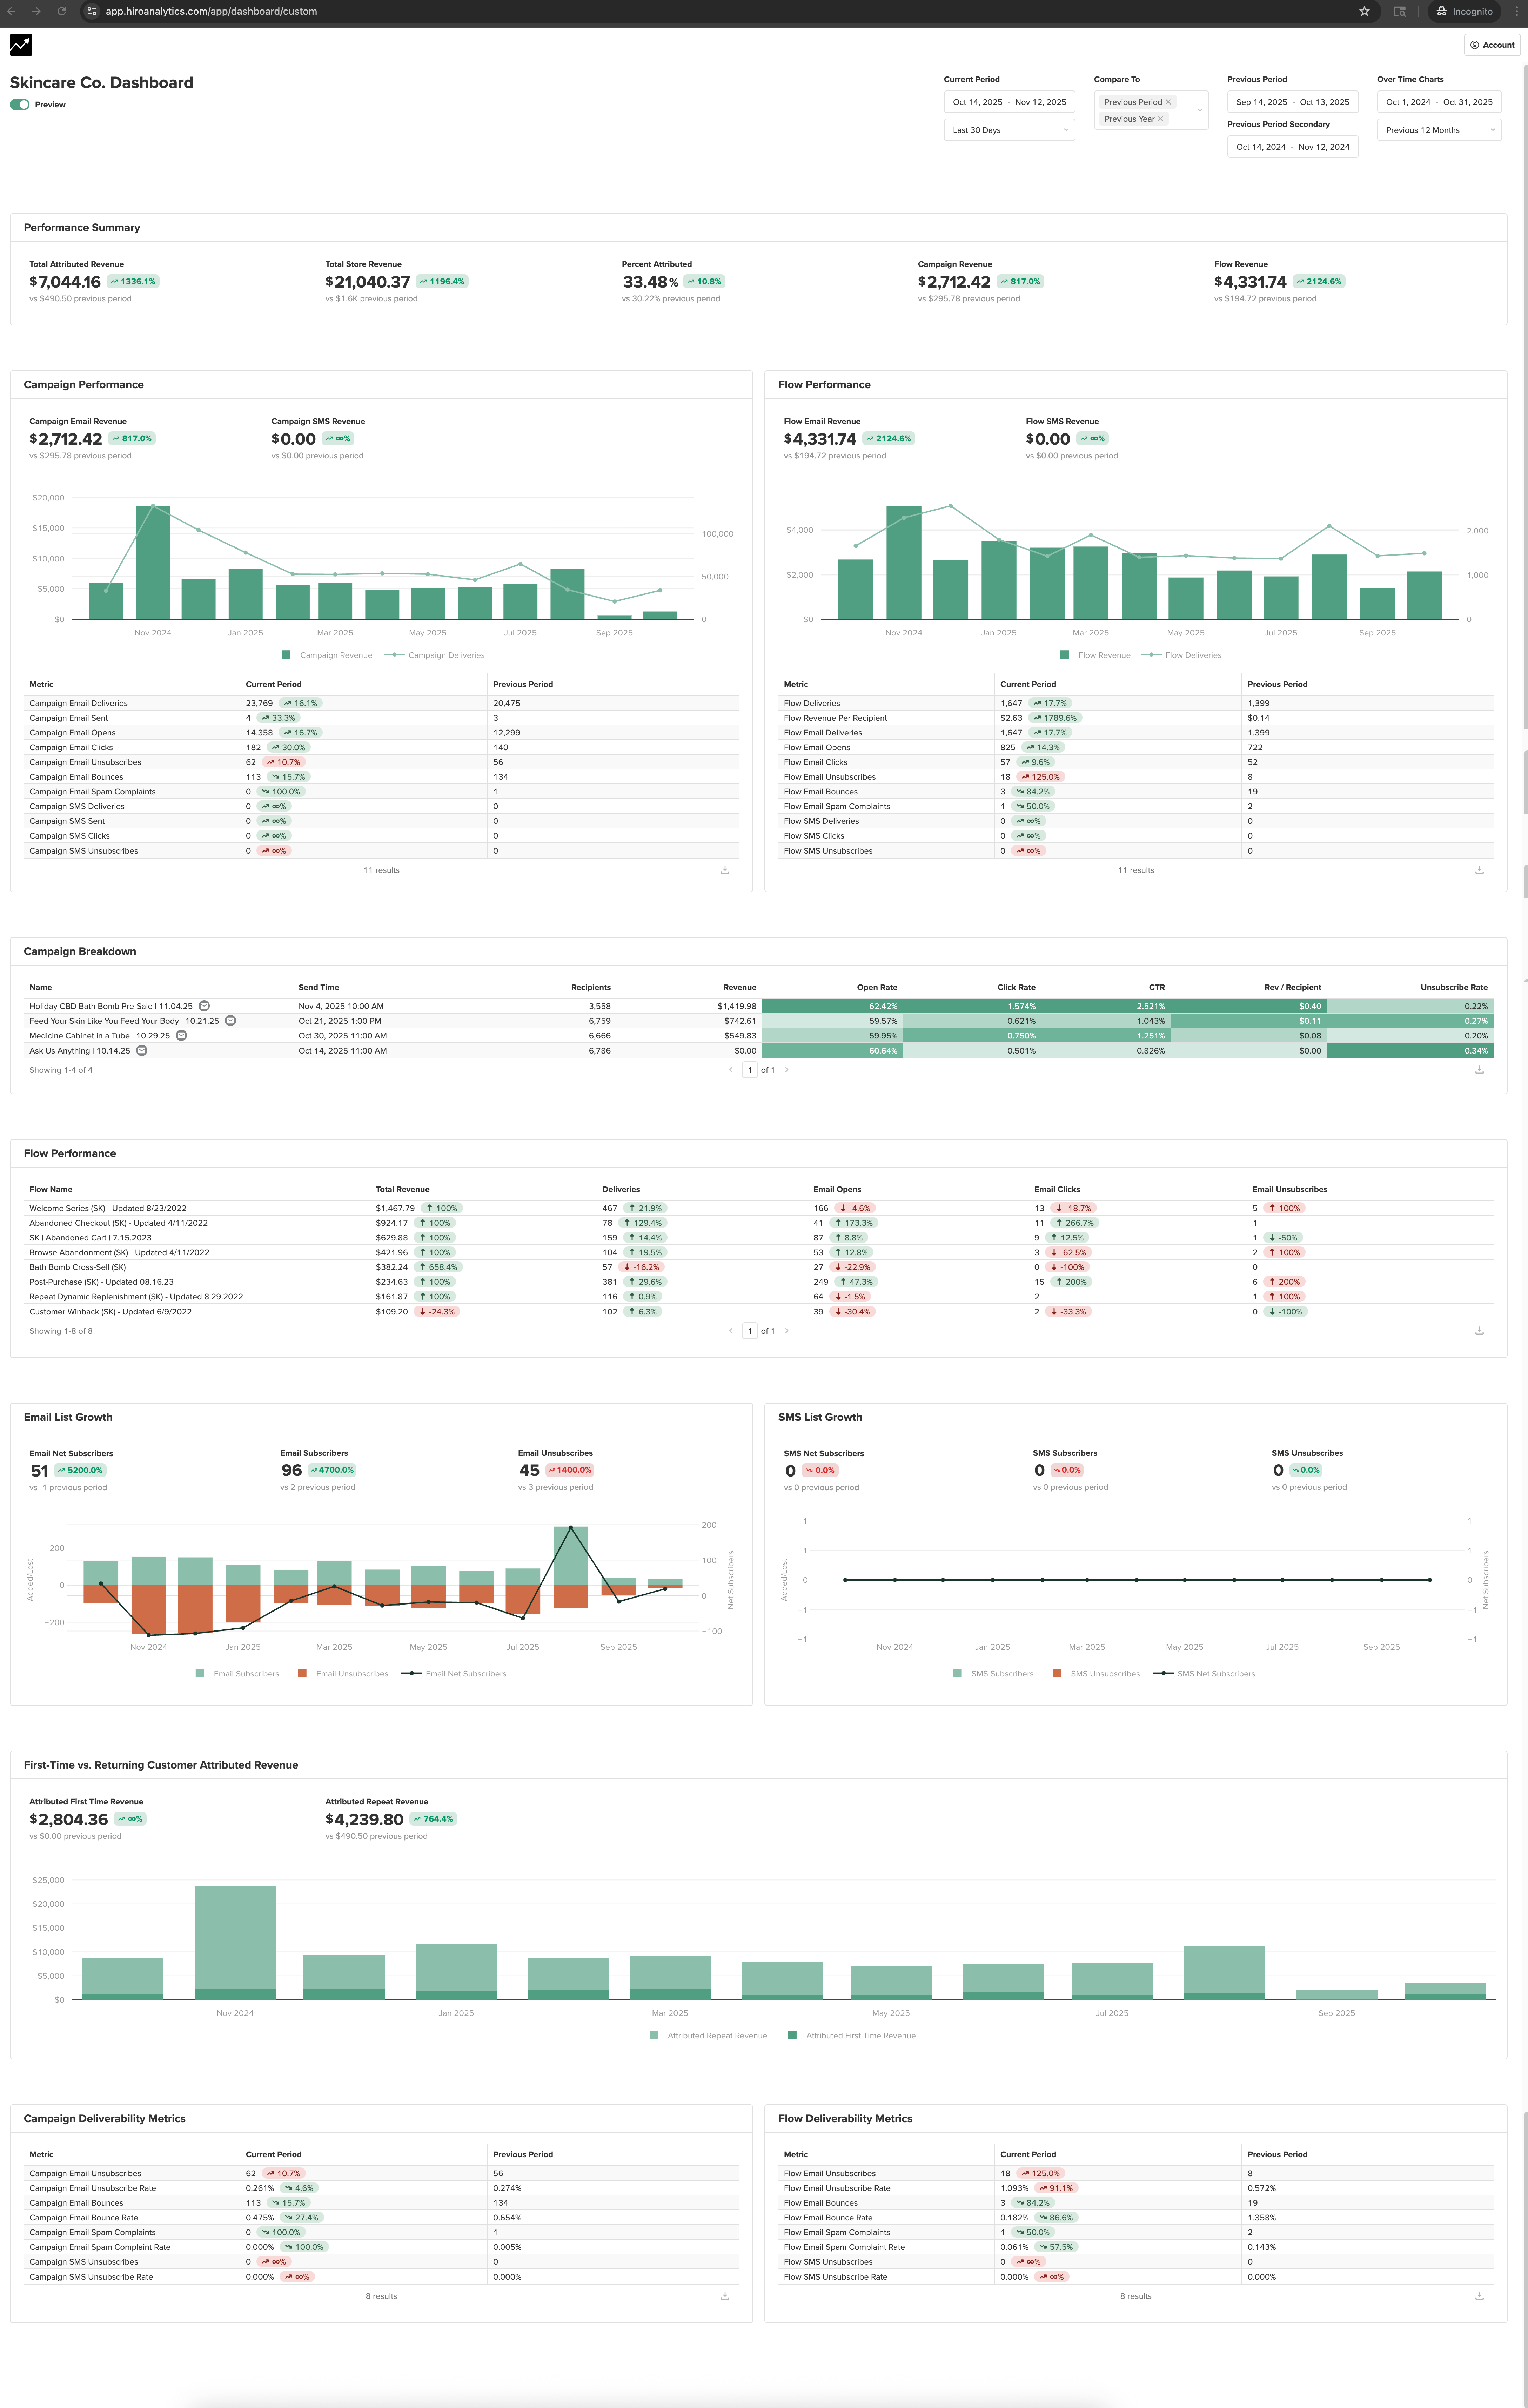
Tip: You can preview the dashboard exactly as clients will see it by checking the “Preview as Client” box on the Custom Dashboard page.
2. Full Hiro Access
Clients can view all pages in Hiro for their brand only. They will not see Agency-wide views, Billing, Admin pages, or any other client accounts.
Inviting a Client
Click Account
Select Manage Users / Billing.
Choose the Client Access tab (second tab).
Click the green “Invite Client” button.
Enter the client's email address.
Select the brand account they should have access to.
Choose their permission level: Custom Dashboard Only (leave “Full Access Client” unchecked) or Full Hiro Access (check “Full Access Client”)
Send the invite.
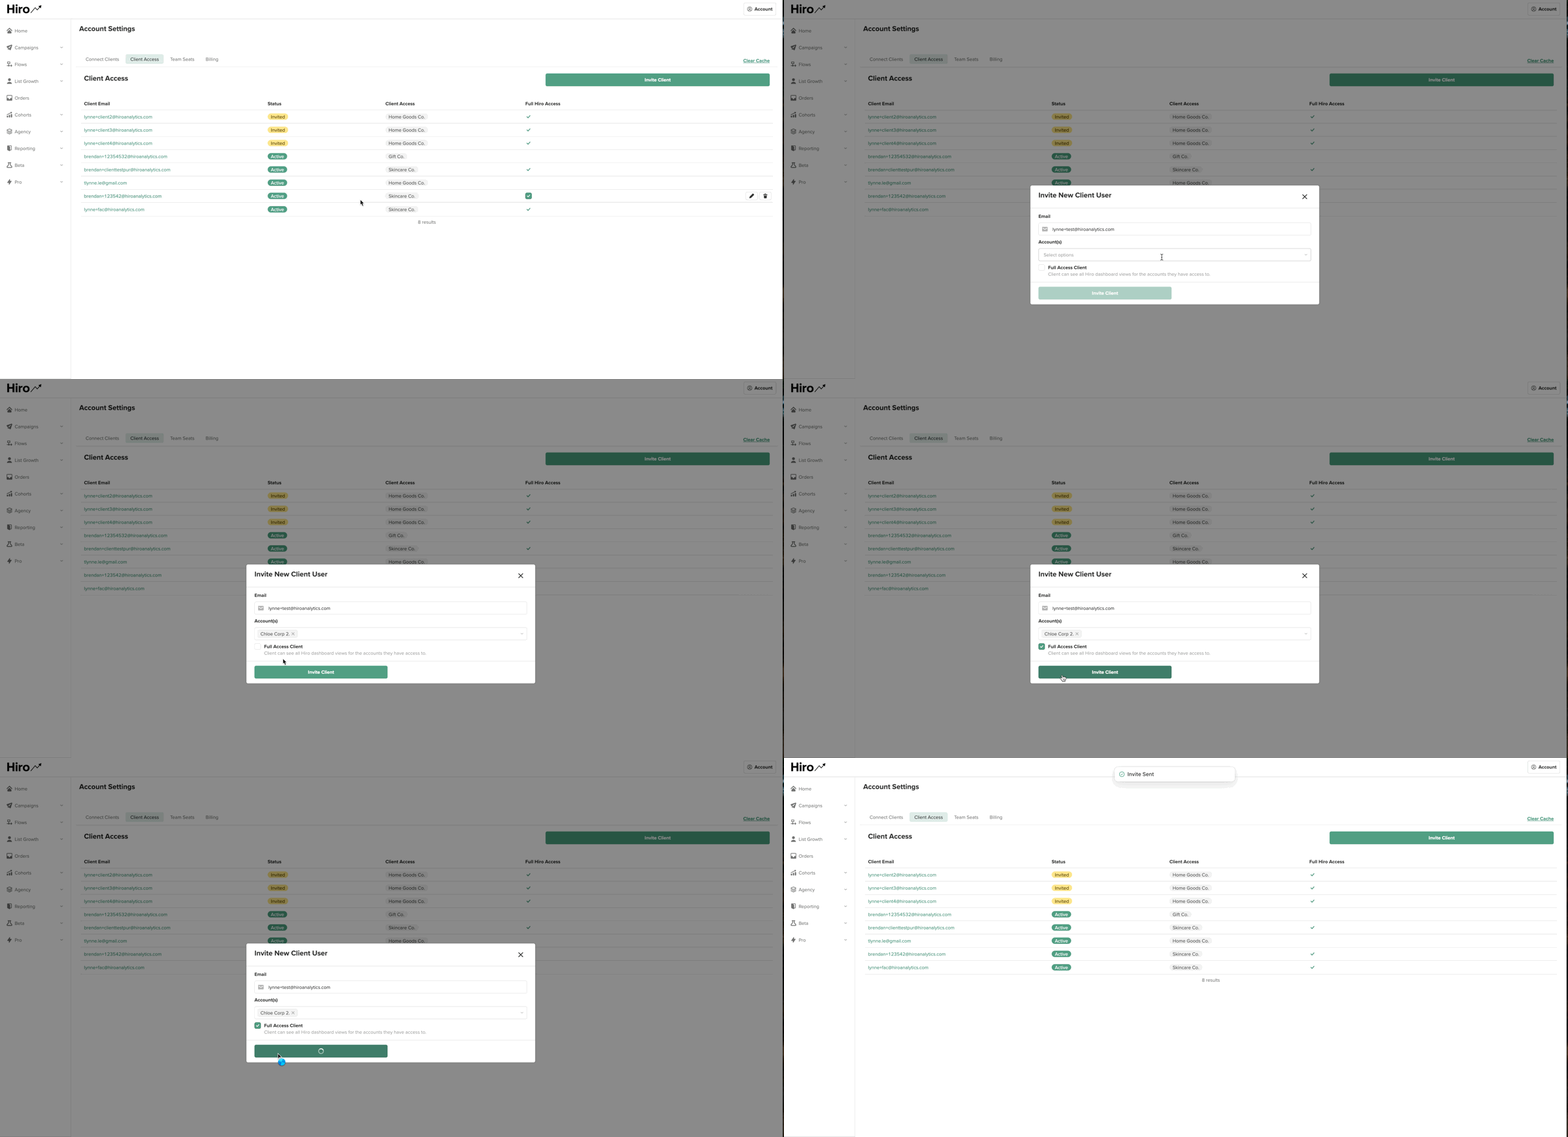
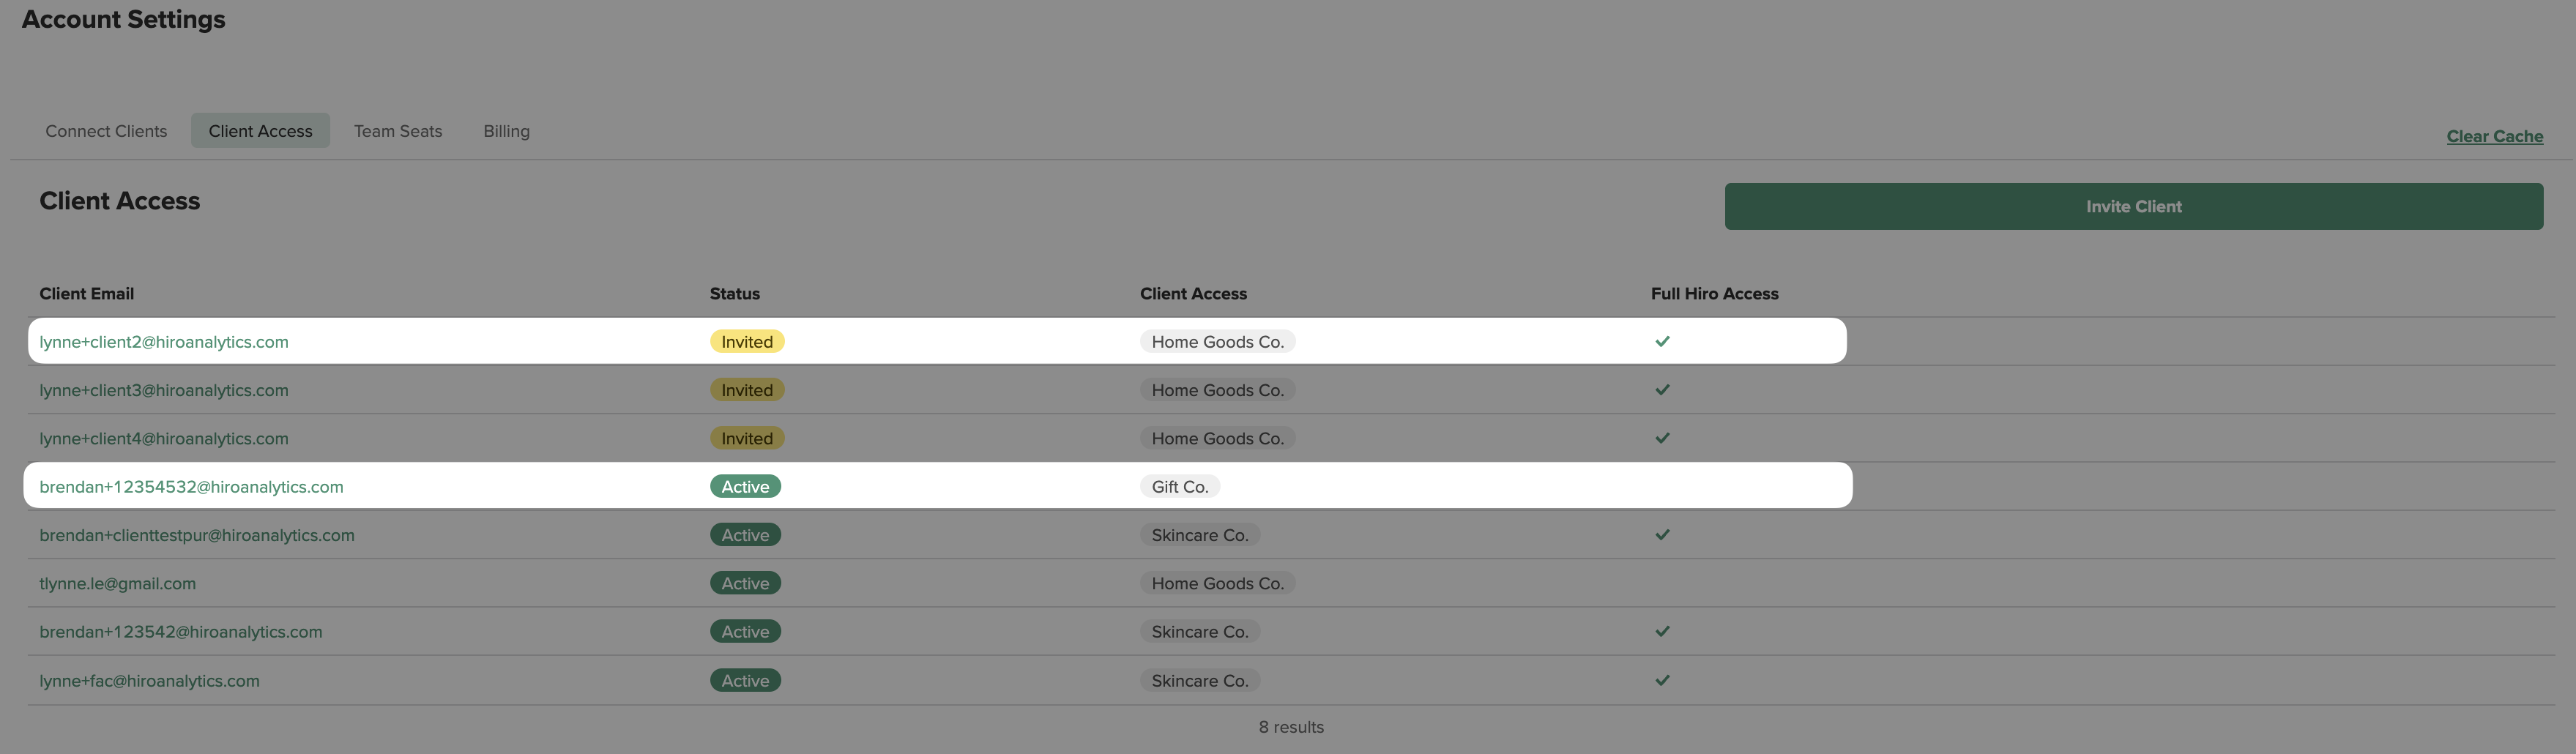
After sending the invitation: a yellow “Invited” label means the client has not yet accepted, and a green “Active” label appears once they accept and activate their account.
Editing Client Access
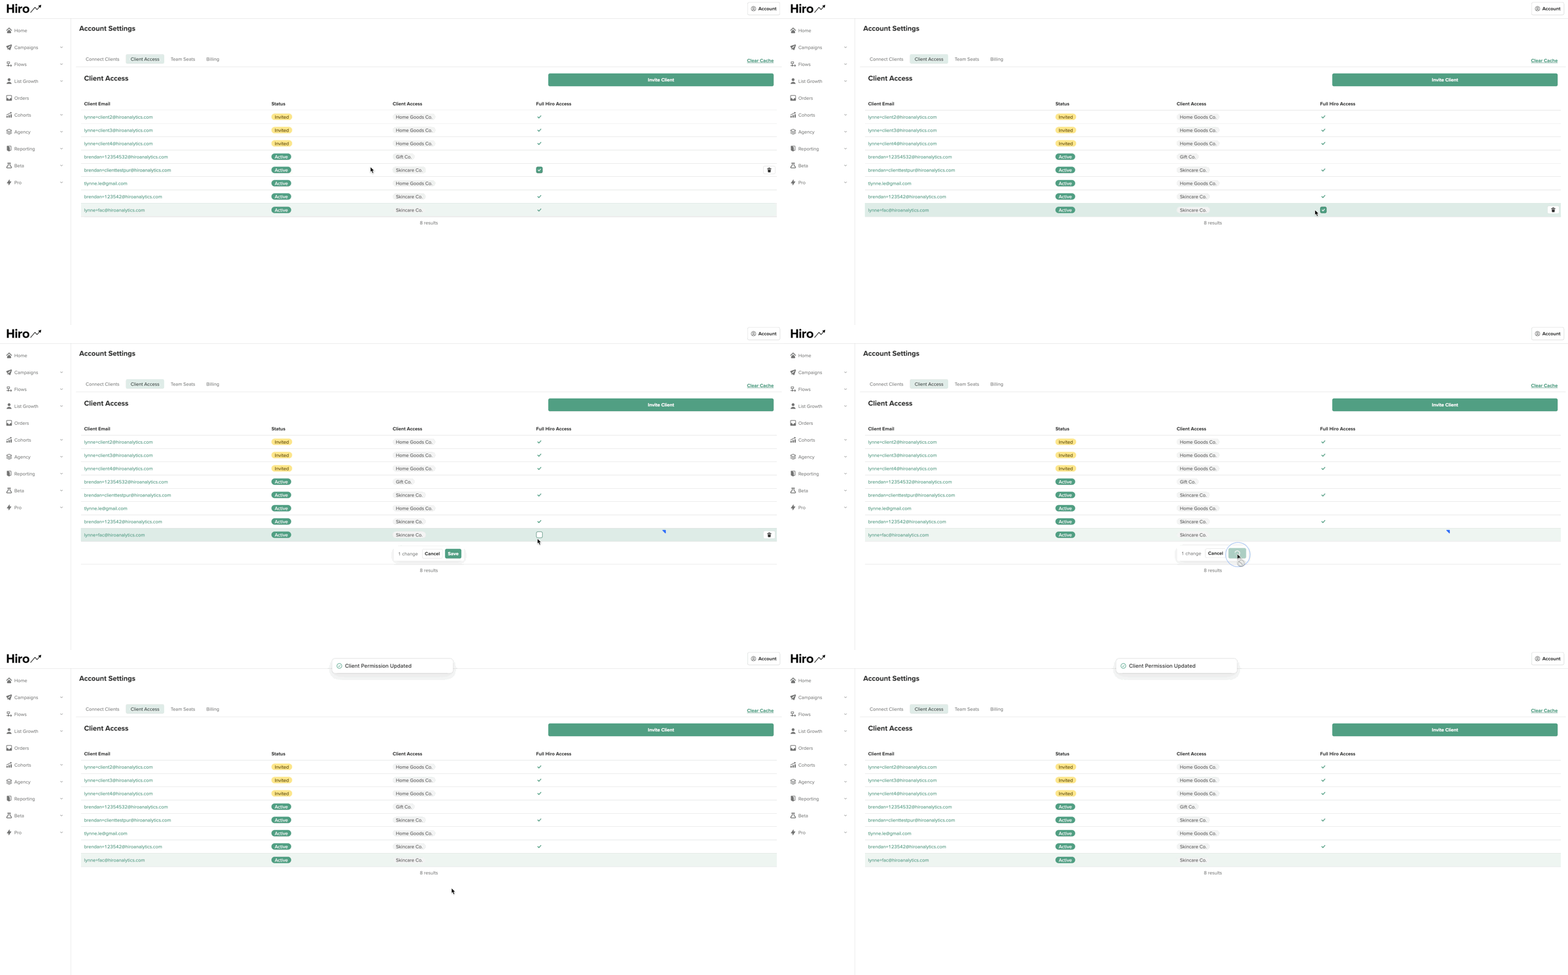
If you need to update permissions: hover over the Full Hiro Access row, and click the checkbox to add or remove Full Hiro Access for that client, then click Save.
Removing Client Access
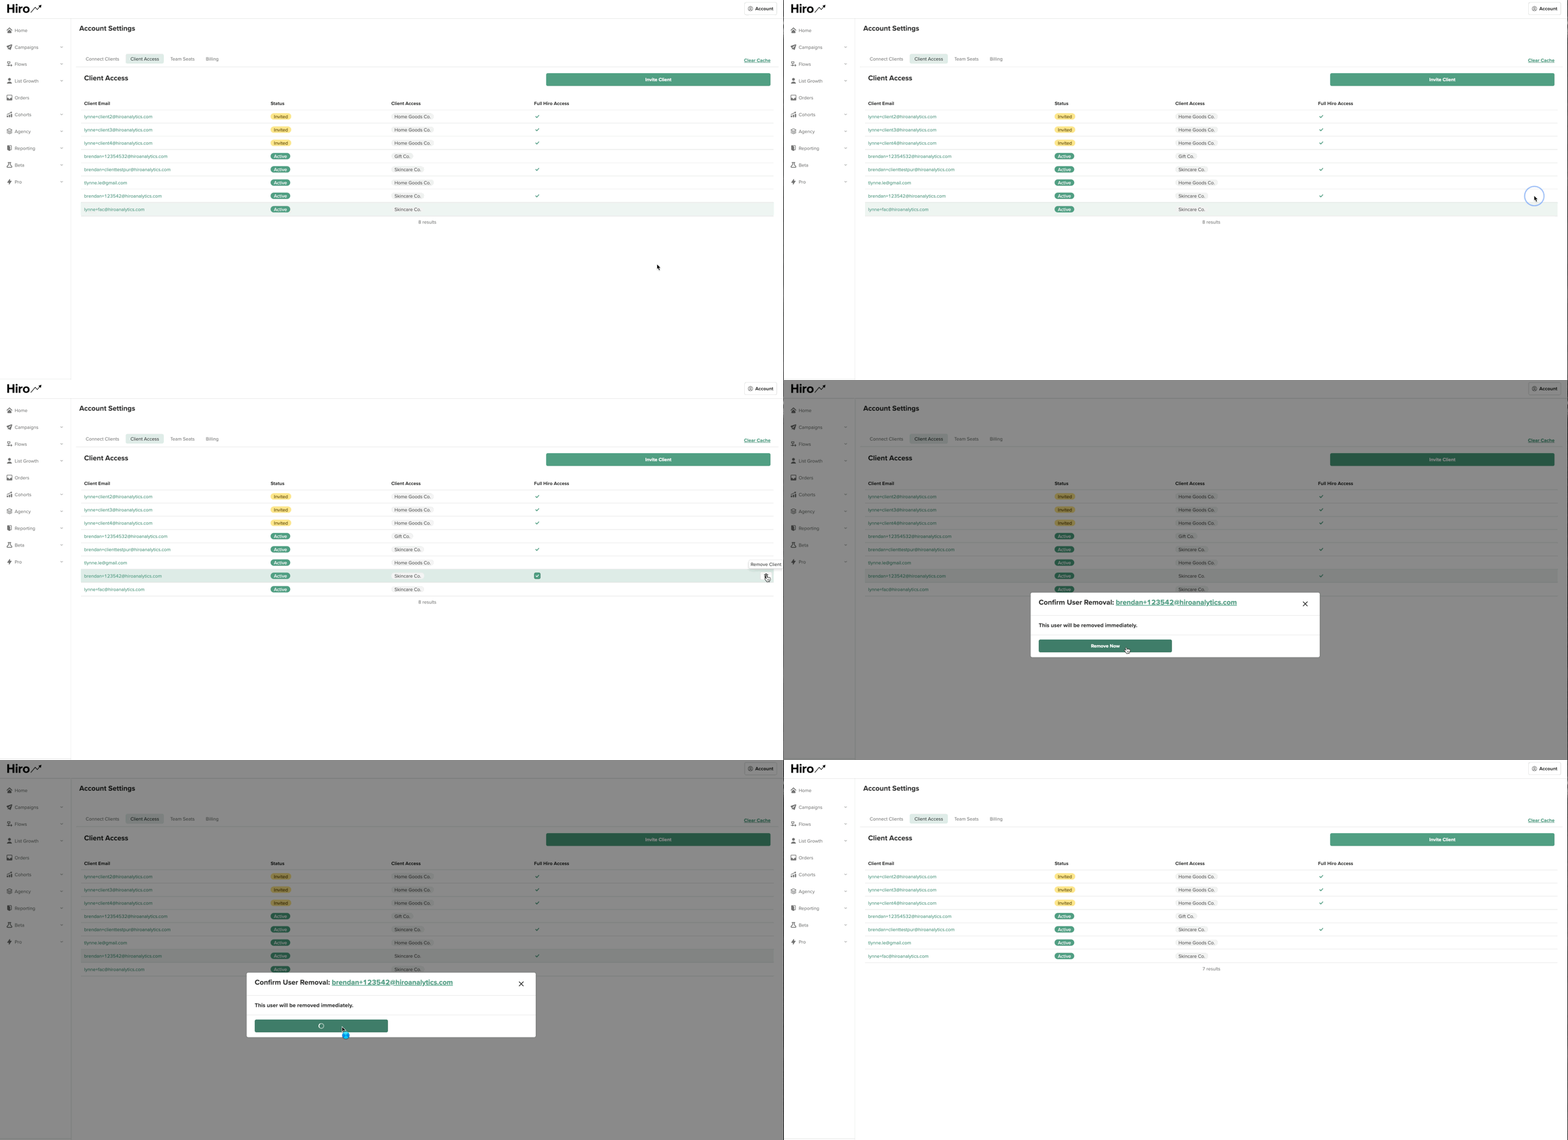
If you need to remove client permissions: hover over the client email to the right side of row where trash can will appear and click on it to remove user, then confirm deletion in the pop-up modal.
Not Seeing Your Client's Email?
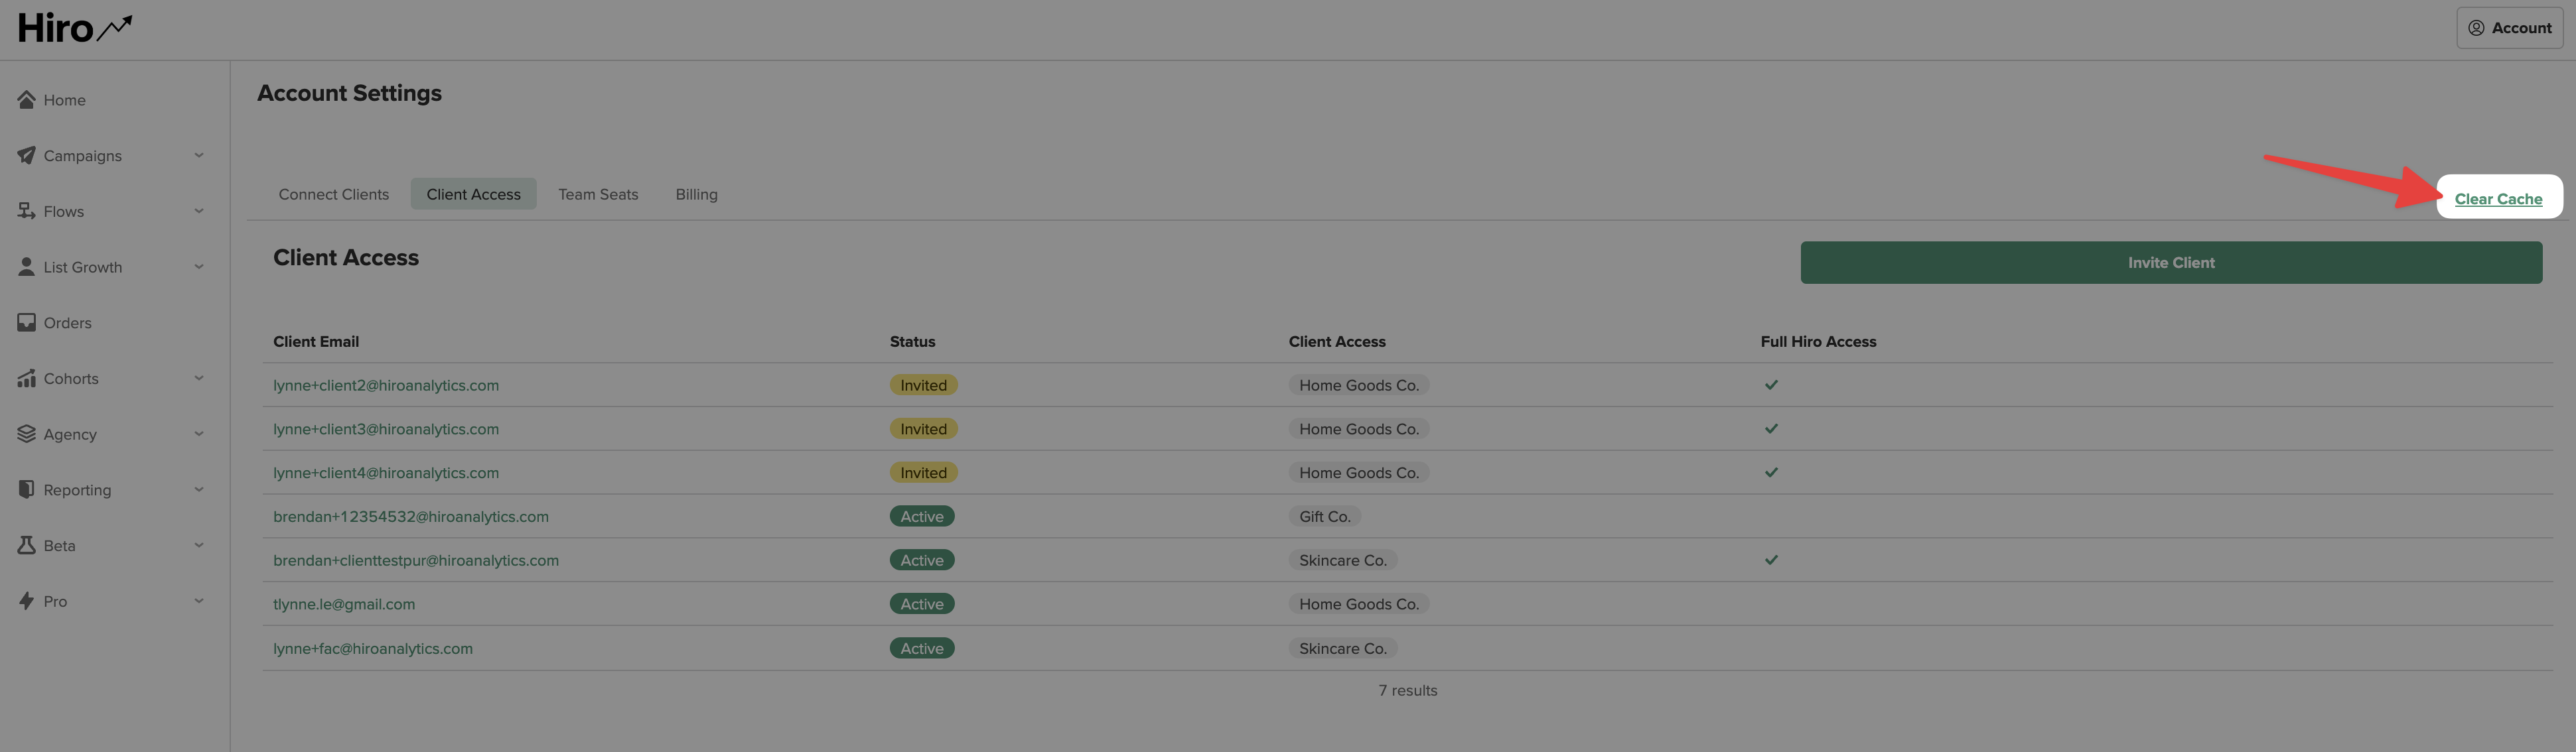
Select the “Clear Cache” link at the top right to refresh the page.
If the email still isn't appearing, reach out to us at help@hiroanalytics.com or message us in your dedicated Slack channel for additional support.