
Campaign Deep Dive
In this article
In this article group
See every campaign in your date range with key metrics in one view. Filter campaigns, preview emails, and see which products drove purchases.
Where to find it
Campaigns → Campaign Deep Dive.
What you see
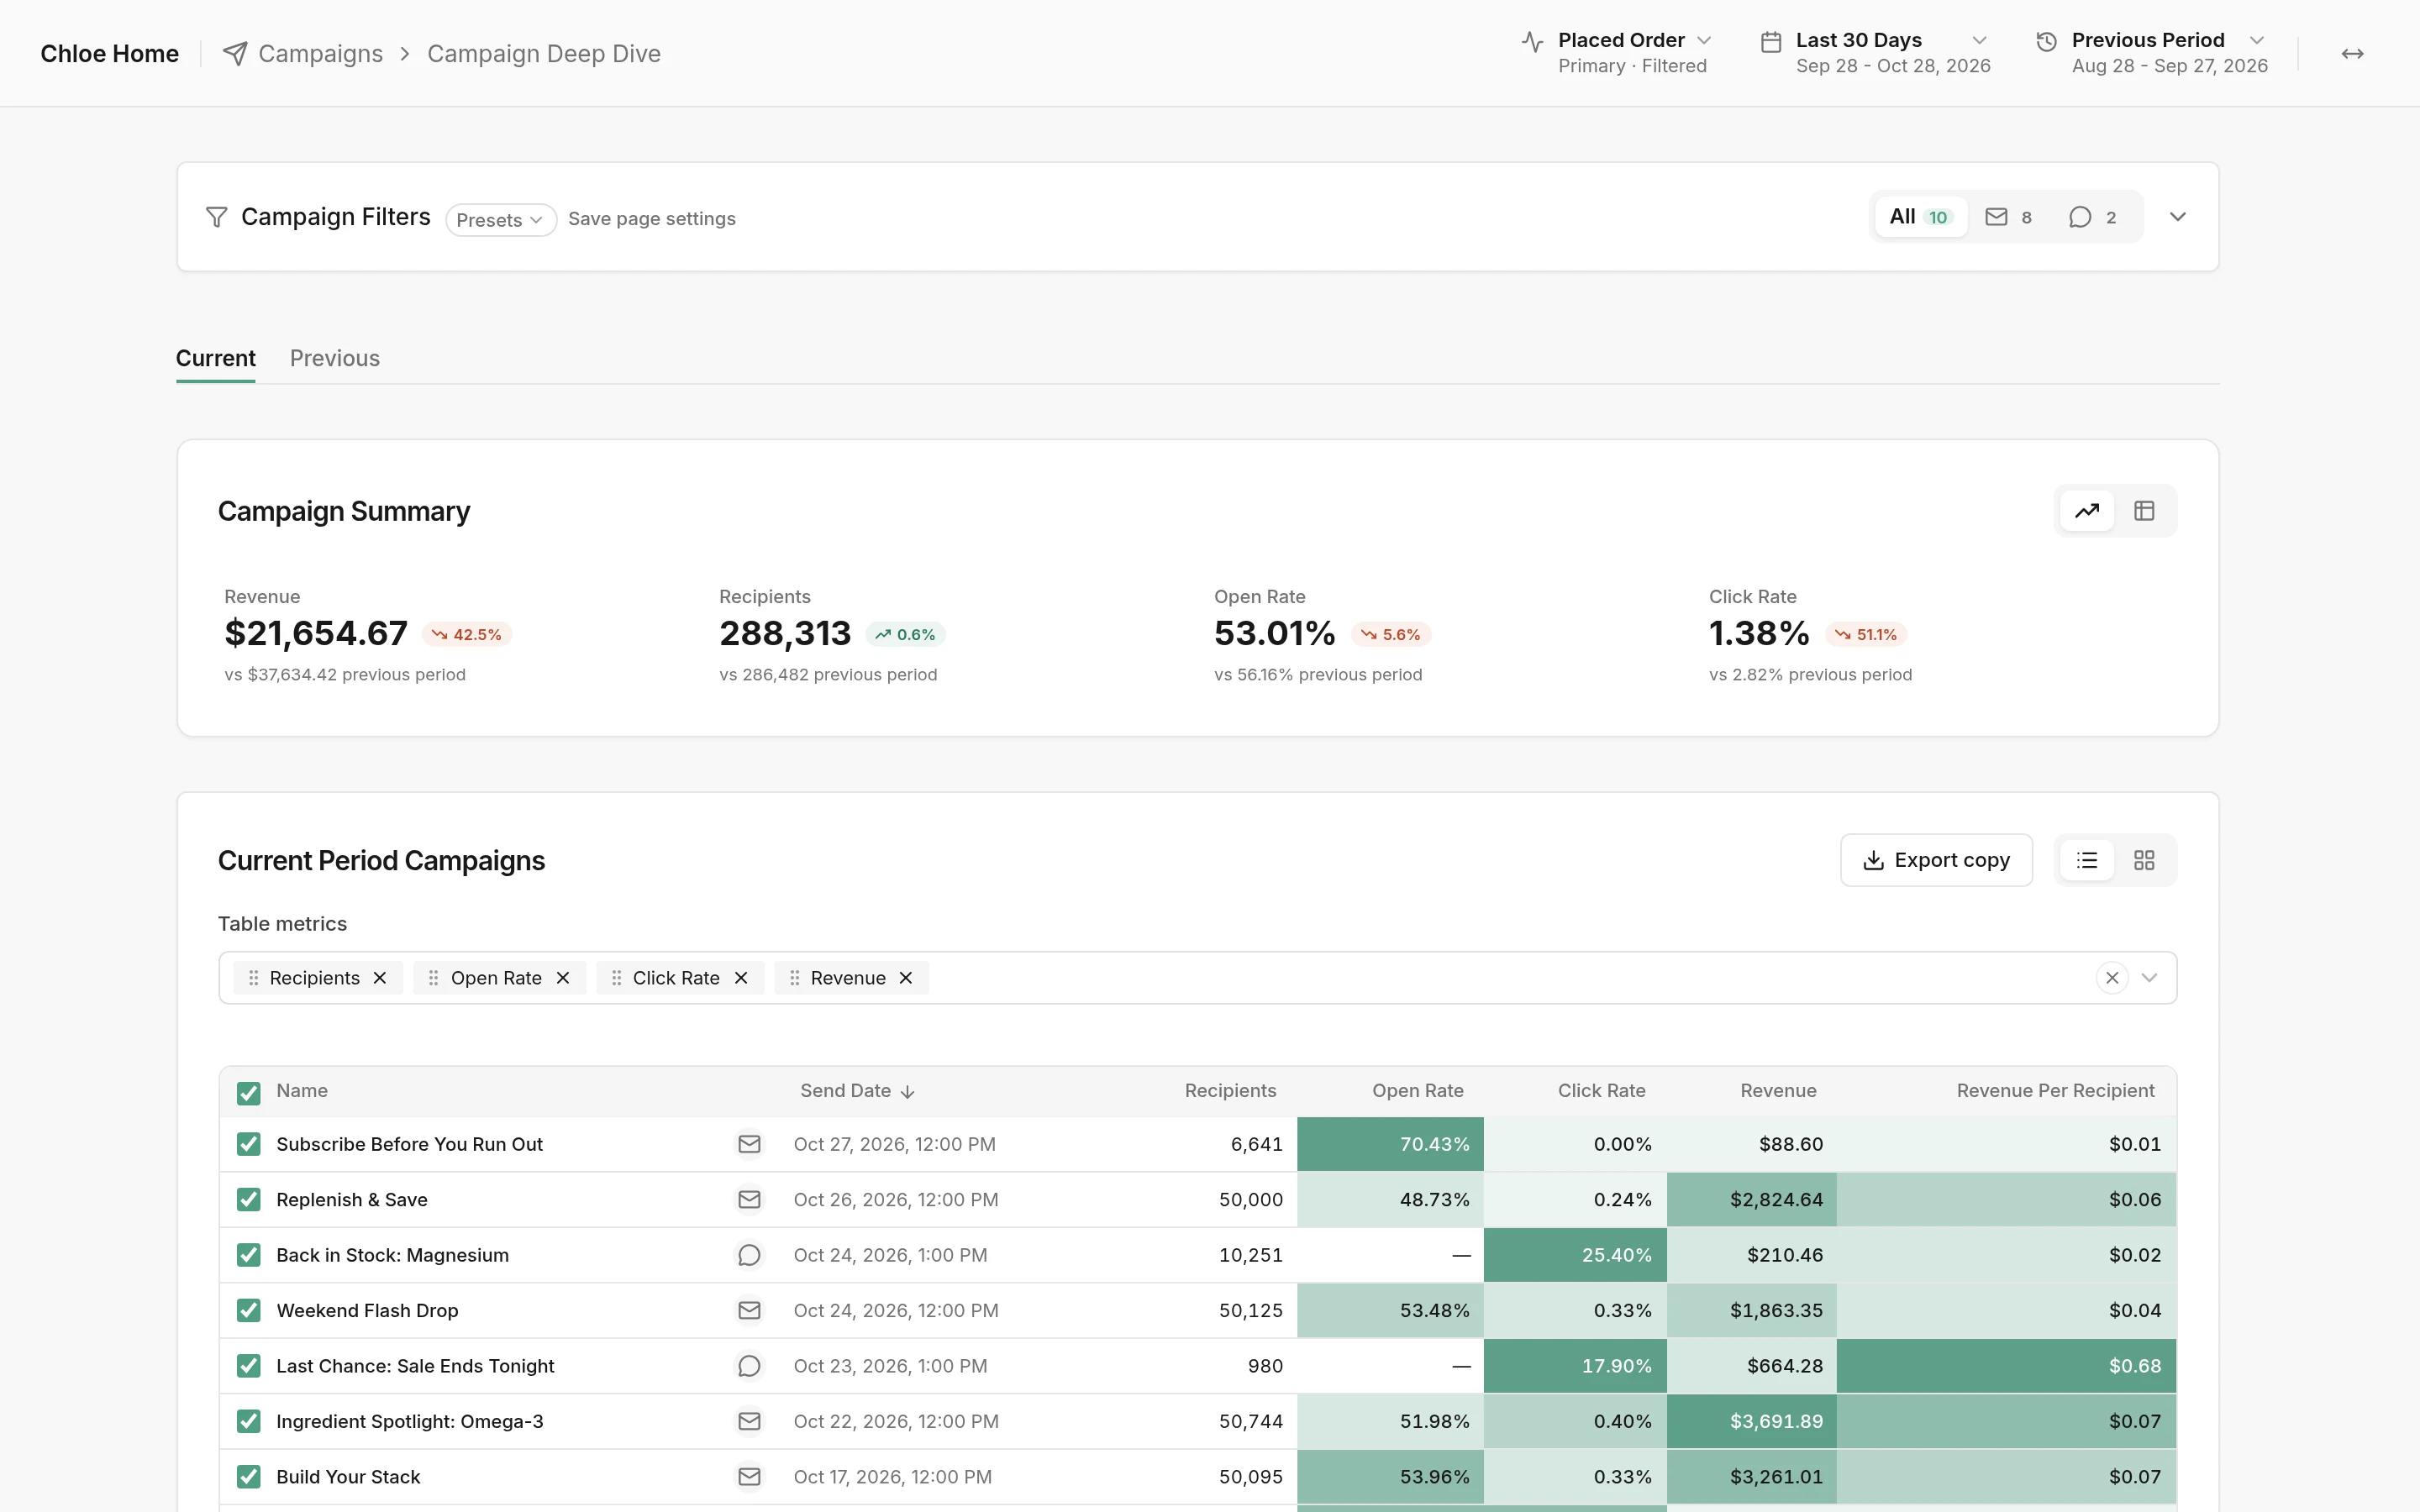
Campaign Filters: the bar at the top. Its tabs switch between all campaigns, email only and SMS only, with a count on each.
Current and Previous: the campaigns in your date range, or the ones in the comparison period.
Campaign Summary: totals for the campaigns in the list, each with its change against the comparison period. The buttons on the right show it as stats or as a table.
Current Period Campaigns: one row per campaign, with its channel, send date and the metrics you chose. The shading marks the best and worst values in each column.
Products Purchased from Selected Campaigns: what people bought from the ticked campaigns, with line items, orders, quantity and revenue for each product.
How to open a campaign
Click a campaign's name. A panel opens on the right with its send date, channel, audiences, subject line and preview text, and the email itself. AI labels show what kind of campaign it is (for example Editorial, Product Highlight).
How to filter the campaigns
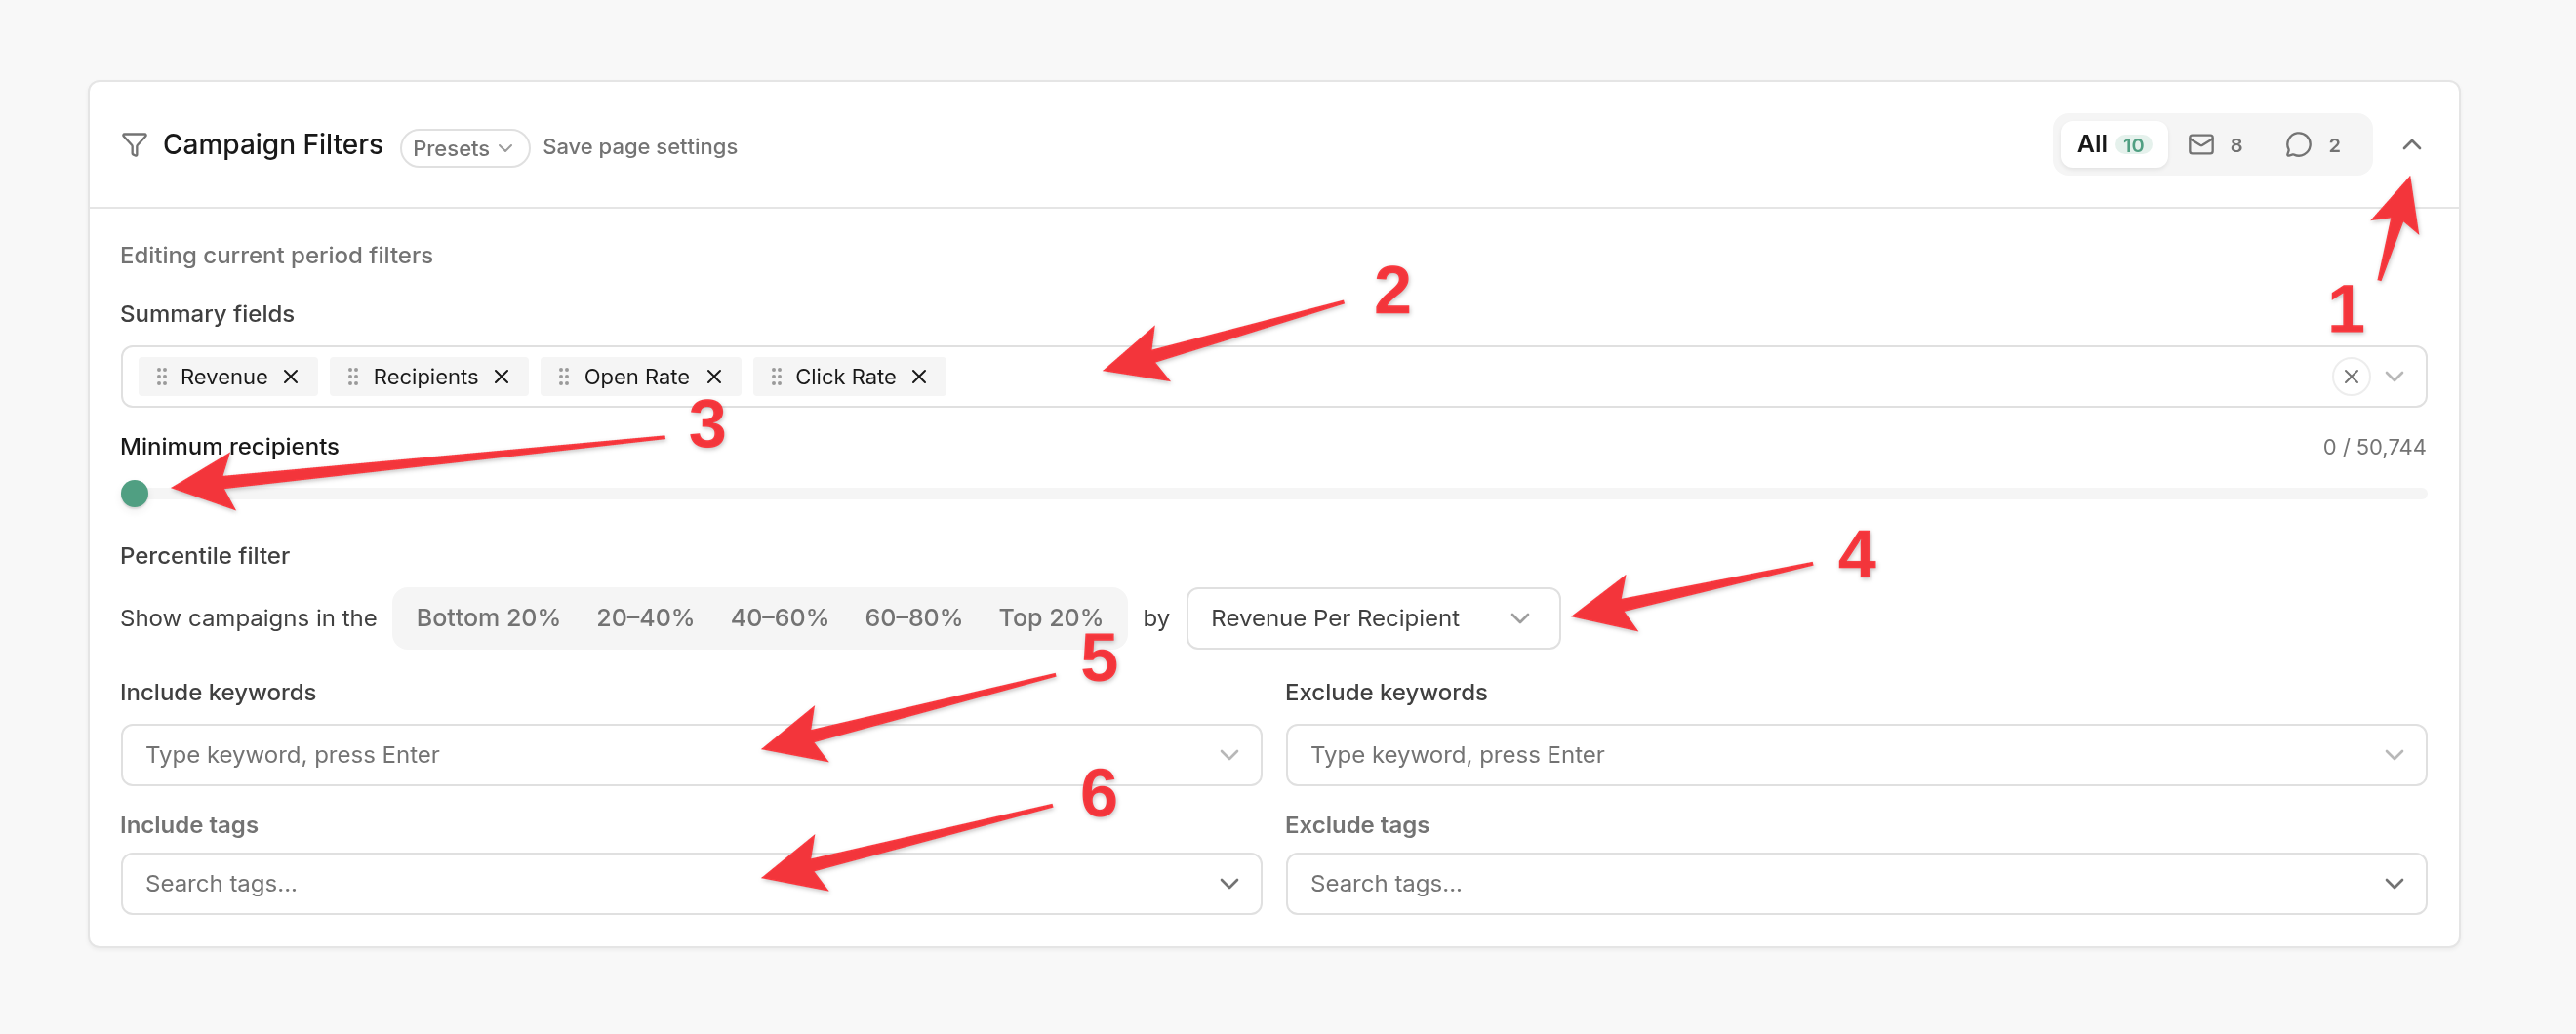
Click the arrow on the right of Campaign Filters to open the filters.
Summary fields: pick which numbers the Campaign Summary shows. Drag them to change the order.
Minimum recipients: drag the slider to hide small sends, such as tests or tiny segments.
Percentile filter: pick a metric, then a band, such as Top 20%, to see only your best (or worst) campaigns on that metric.
Include keywords and Exclude keywords: type a word from the campaign name and press Enter.
Include tags and Exclude tags: filter by the tags you set on Campaign Tags.
The filters apply to the tab you're on, so the Current and Previous tabs can be filtered differently.
Click Save page settings to keep your filters and columns as a preset, for you or your team, for this client or all clients. Pick it later from Presets.
How to change the table and export it
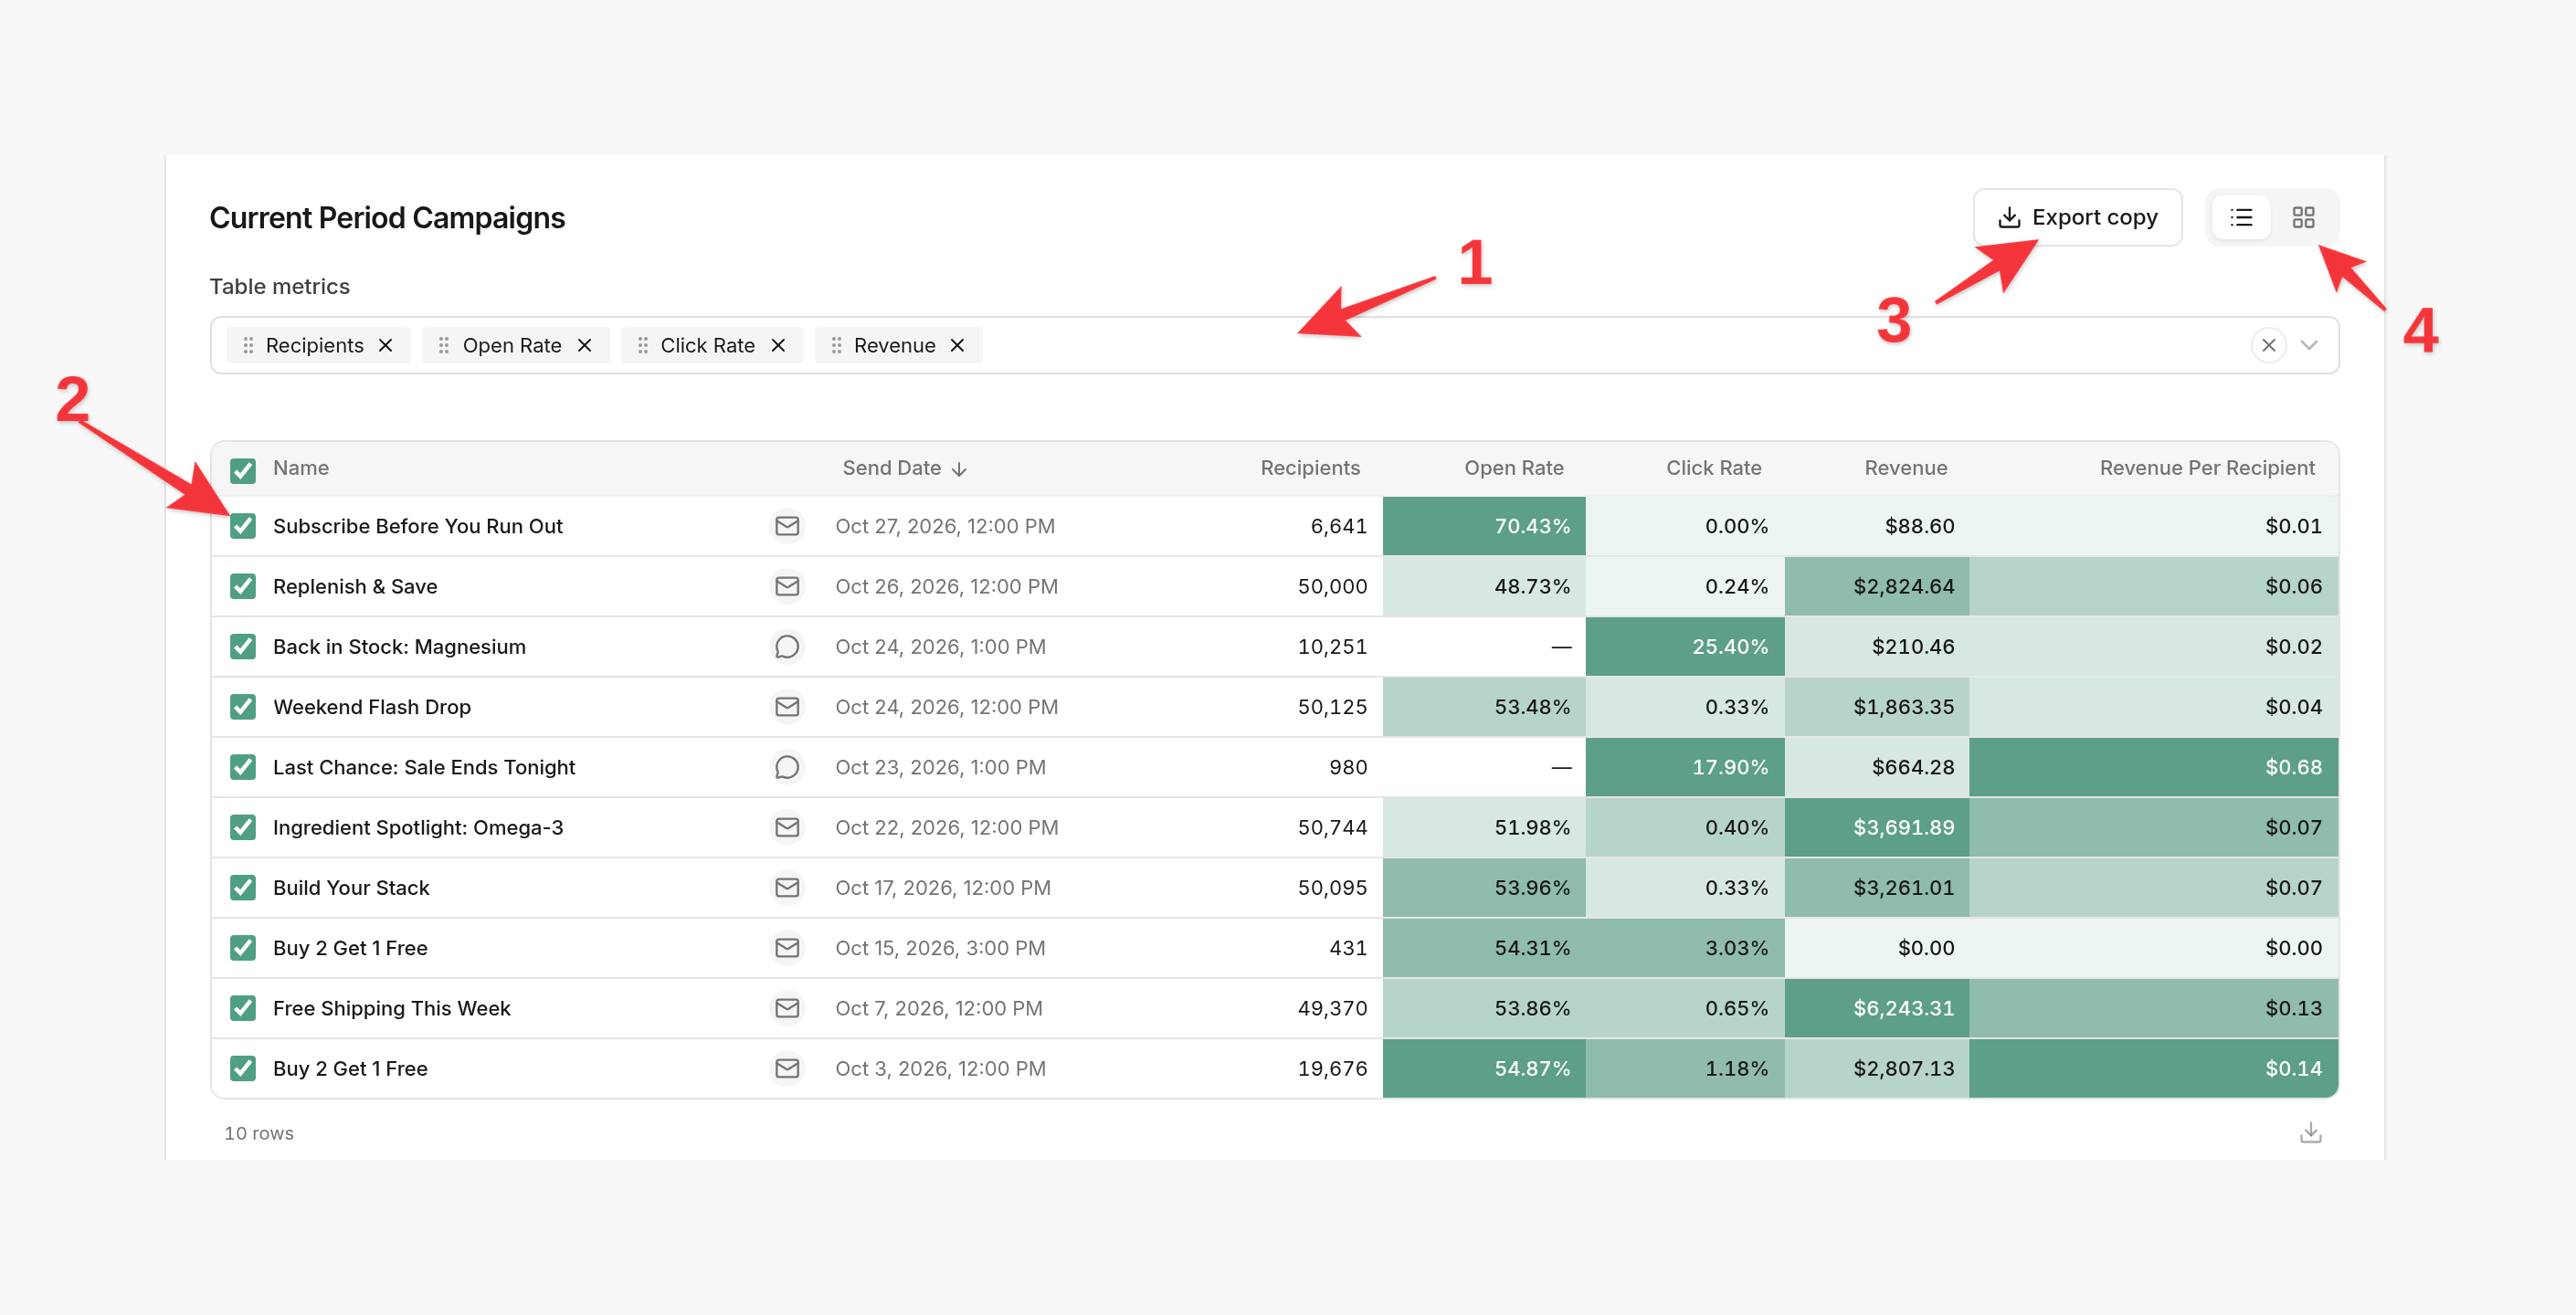
Table metrics: add or remove columns, and drag them to change the order.
Untick a campaign to leave it out of the Campaign Summary, the products table and the export.
Export copy: download the subject line, preview text, SMS text and email copy of every ticked campaign.
Switch between the list and tiles, which show each campaign's email next to its numbers.
The download button under the table exports the table itself as a CSV.
How to see which products the campaigns sold
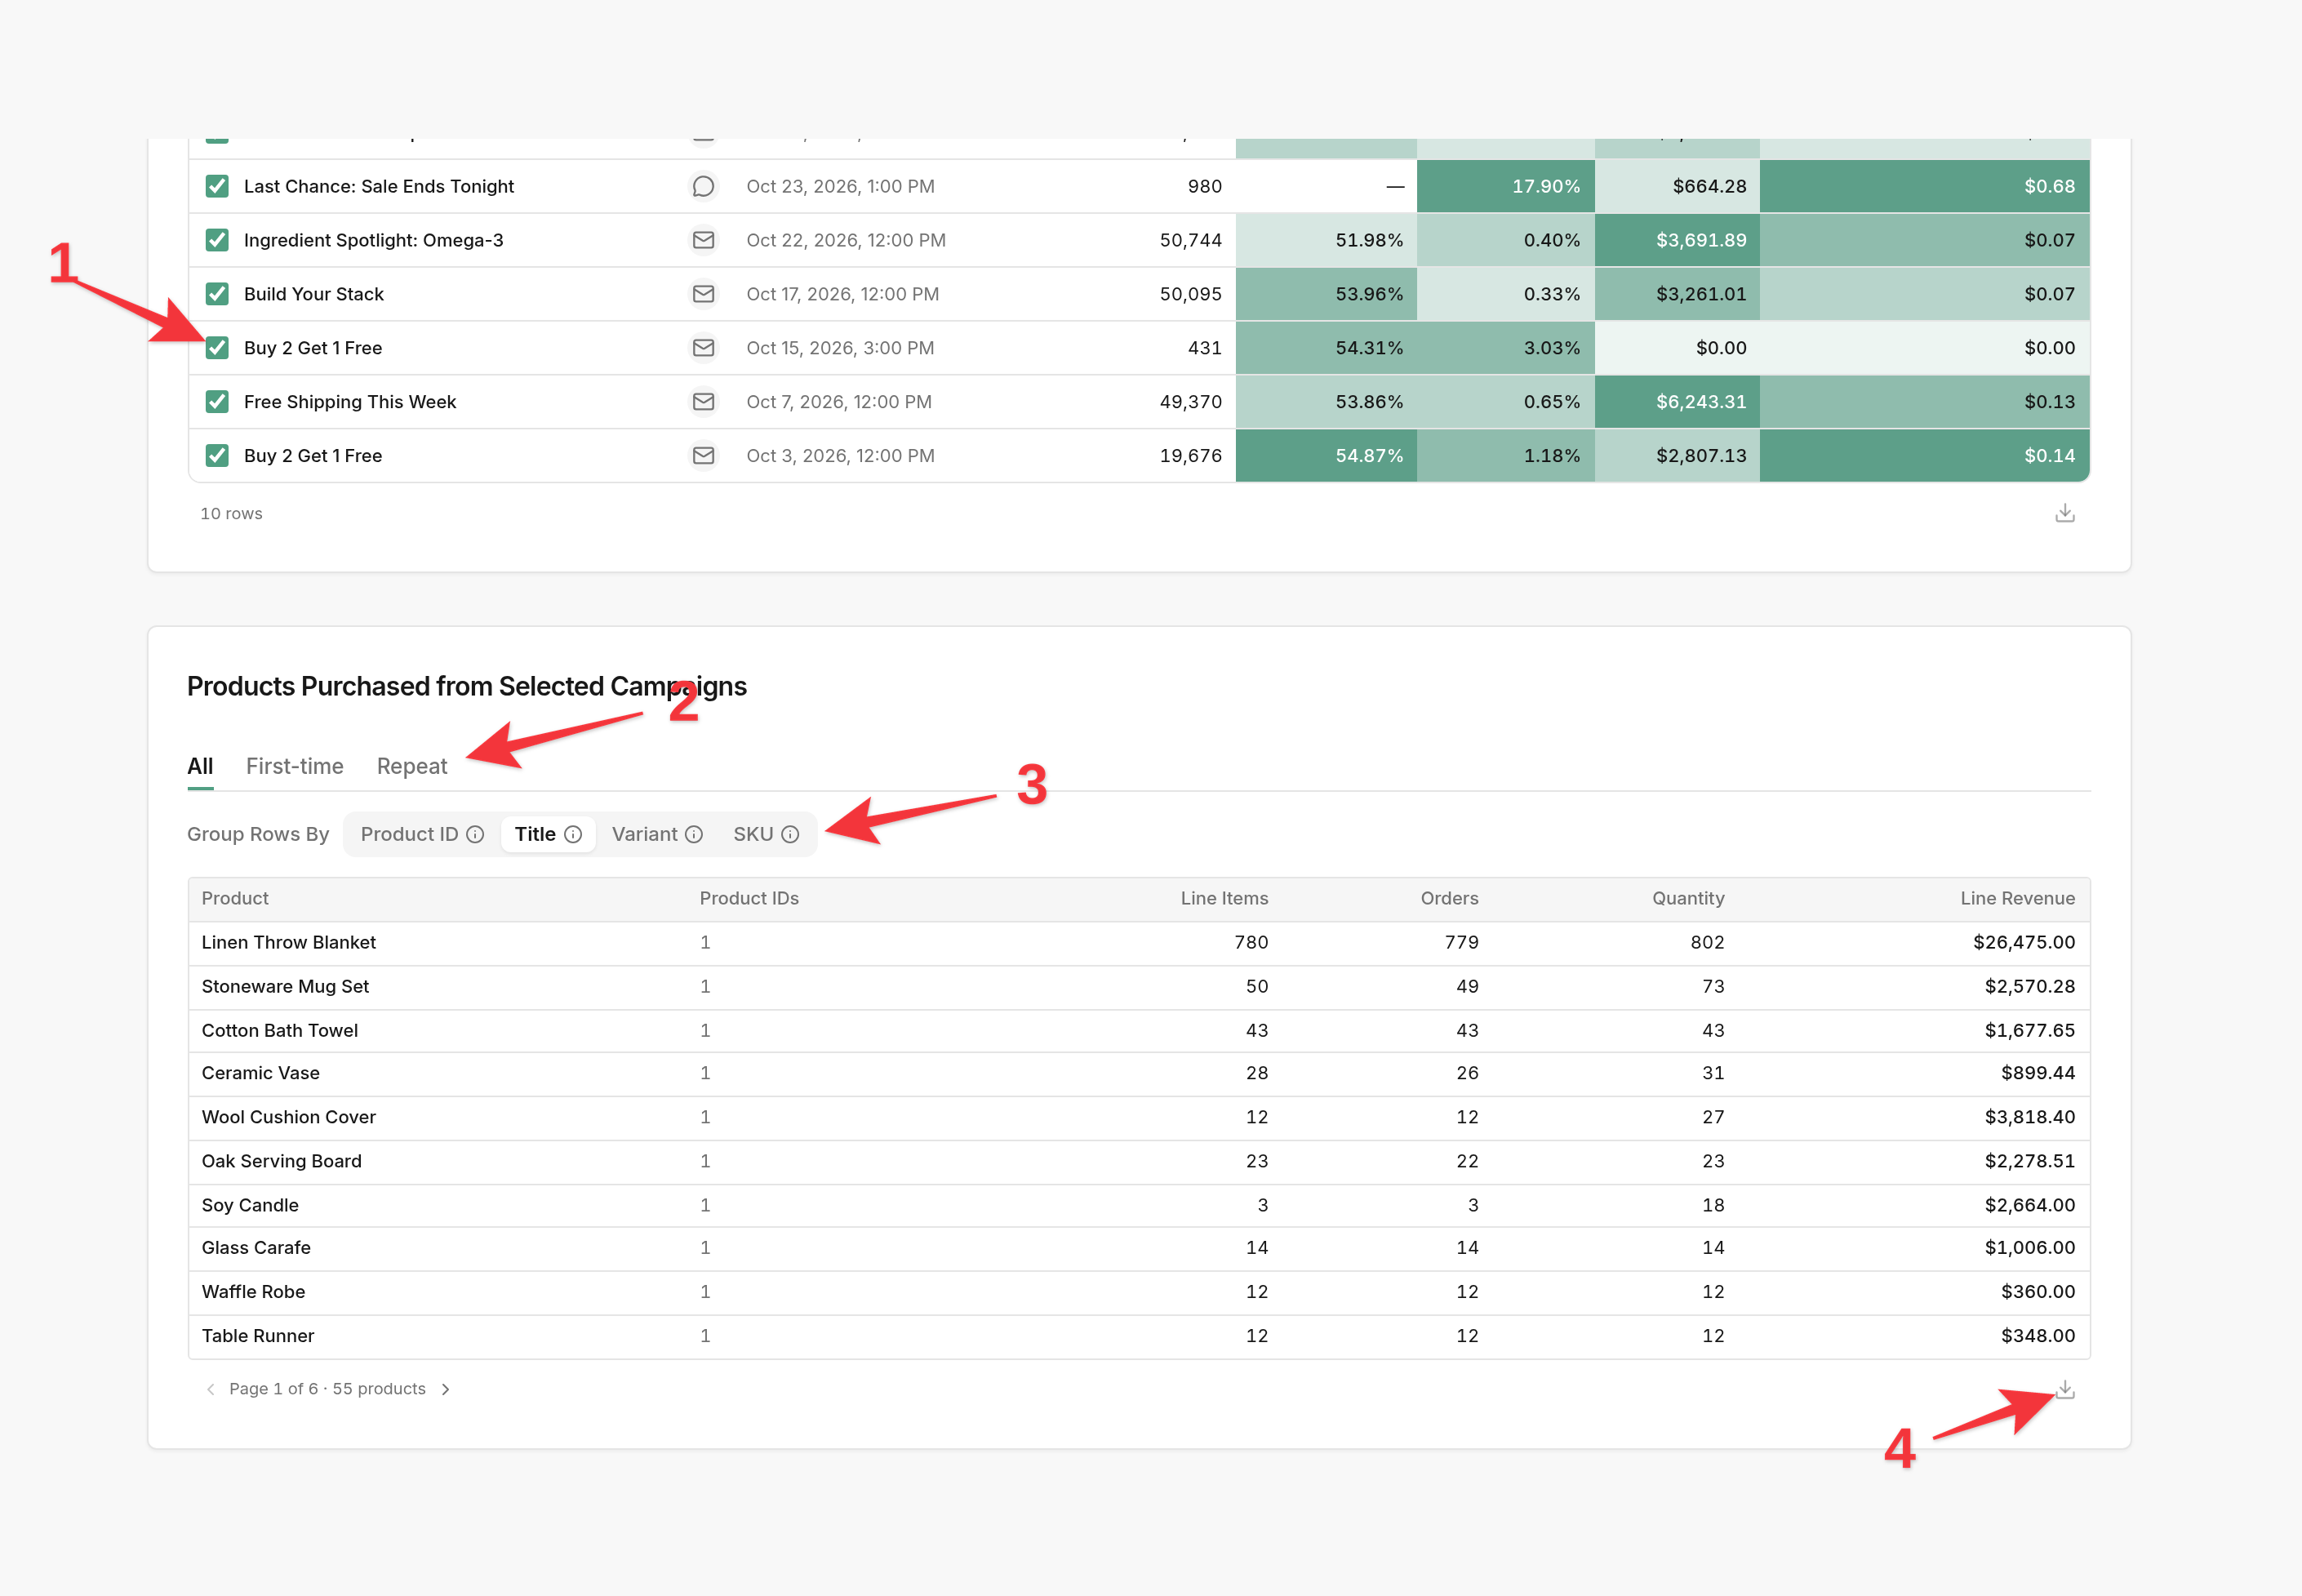
Tick the campaigns you want in the table above. Every campaign is ticked to start with.
Choose All, First-time or Repeat to see what all buyers, new customers or returning customers bought.
Under Group Rows By, combine rows by Product ID, Title, Variant or SKU.
Download the table as a CSV.
More about these numbers
The page controls set everything. The conversion metric, date range and comparison at the top of the page apply to every number here, as on Campaign Overview.
Revenue follows your attribution settings, set per client in Client settings → Attribution.